
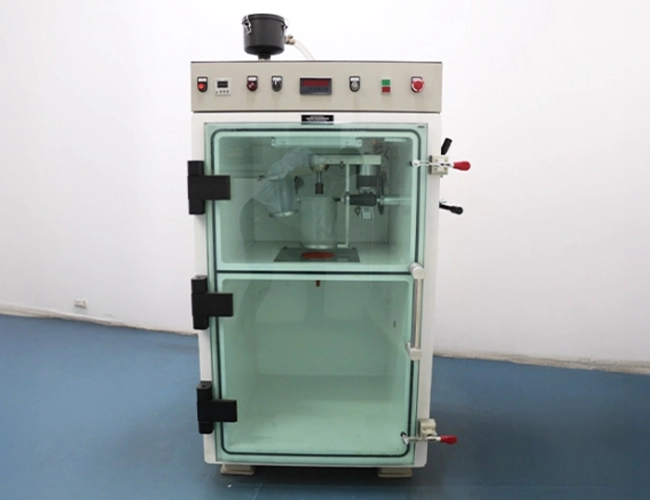
A batch shows pinholes, incomplete filling, voids or inconsistent surfaces. Because defects can originate in the master, mould, mixing, vacuum stage or cure, correcting only the final symptom wastes time. This article explains how vacuum casting defects should be evaluated from the customer-problem, engineering-decision and commercial-buyer perspectives. It also shows what information should be shared with a professional manufacturing partner so the quotation, process and final part are aligned with the real project objective.
Vacuum casting defects is most useful when it is selected around a real engineering and commercial objective. This guide explains the practical decisions product teams, engineers and procurement teams should make before approving the next manufacturing step.
Defects usually have more than one cause
Project-specific feasibility, material and quantity questions can be shared through the Excel Rapidtech contact page.
A visible bubble may come from trapped air, poor venting, moisture, incorrect mixing or a geometry that prevents complete filling. Surface marks can originate in the master pattern, the silicone mould or the finishing stage. Effective troubleshooting therefore follows the complete process rather than blaming a single step.
Master-pattern defects
The mould copies the master. Layer marks, scratches, filler lines, dust and uneven paint can be transferred to every cast part. The master should be inspected under suitable light and measured at critical features before the mould is created.
Mixing and degassing
Casting components must be measured and mixed correctly. Aggressive mixing can introduce air, while insufficient mixing can create areas that do not cure consistently. Vacuum degassing helps remove entrapped air, but the timing must suit the material's working life.
Gating and venting
The resin needs a clear path into the cavity and displaced air needs a path out. Poorly placed gates or vents can leave unfilled features, bubbles at high points or flow marks. Complex geometry may require additional planning to ensure complete filling.
Moisture and contamination
Moisture can react with certain resins and create bubbles. Contamination from tools, mould-release products or an improperly prepared mould can also affect the surface and cure. Clean handling is therefore part of quality control.
Curing and demoulding
Removing the part too early can distort edges or damage the surface. Excessive heat or an incorrect cure cycle can also affect dimensions and mould life. The process should define when the part is safe to remove and when it is ready for inspection.
What buyers should inspect
Agree on acceptable cosmetic zones, critical dimensions and the type of defects that will lead to rejection. A hidden internal bubble may be irrelevant for a visual sample but unacceptable for a thin structural area.
How Excel Rapidtech controls quality
A professional vacuum casting workflow should combine master inspection, mould planning, controlled mixing, degassing, curing and final inspection. Excel Rapidtech can align these controls with the part's intended use and approved quality criteria.
Key engineering factors to evaluate
For a detailed overview of the manufacturing route, review Excel Rapidtech's vacuum casting services.
The following factors should be reviewed together. Optimising one in isolation can create a new problem elsewhere in the project.
Master cleanliness and finish. Define the requirement in measurable terms and explain how it affects the intended test, assembly or production decision.
Gate and vent position. Define the requirement in measurable terms and explain how it affects the intended test, assembly or production decision.
Mix ratio and working time. Define the requirement in measurable terms and explain how it affects the intended test, assembly or production decision.
Moisture control. Define the requirement in measurable terms and explain how it affects the intended test, assembly or production decision.
Cure and demould timing. Define the requirement in measurable terms and explain how it affects the intended test, assembly or production decision.
Practical comparison framework
| Decision area | Option or condition A | Option or condition B |
|---|---|---|
| Pinholes | Entrapped air or moisture | Review mixing, degassing and storage |
| Incomplete detail | Poor flow or trapped air | Improve gates, vents and orientation |
| Surface scratches | Defect on master or mould | Refinish and reinspect reference surface |
| Warping | Early demoulding or uneven cure | Control cure and handling |
| Soft areas | Incorrect mixing or contamination | Verify ratio, tools and process control |
How the complete vacuum casting workflow affects the result
The process begins before resin is poured. CAD review determines whether undercuts, thin walls and trapped regions are suitable. The master pattern establishes geometry and surface quality. Silicone mould planning controls the split, gates and vents. Material preparation, vacuum handling, cure and demoulding then determine whether the copy is complete and stable. Finally, trimming, finishing and inspection convert the casting into an approved part. A weakness at any stage can appear as a dimensional, cosmetic or delivery problem later. Buyers should therefore evaluate the workflow as an integrated chain rather than treating casting as a single machine operation.
Cost and lead-time drivers that should be discussed early
Cost is influenced by master-pattern production, surface preparation, mould complexity, number of moulds, resin, colour, finishing, inspection and approved quantity. Lead time is affected by CAD clarification, master approval, silicone curing, trial castings and any rework required before the batch begins. Urgent projects benefit from a complete brief and fast approval process, not from skipping controls. The quotation should state assumptions so both parties understand what will change the price or schedule.
Information to share with the service provider
When the design is still changing, compare this route with professional 3D printing services in India before committing to a batch process.
Provide a STEP file where possible, the required approved quantity, the purpose of the parts, colour and finish expectations, critical dimensions, mating components and the planned test environment. Identify cosmetic faces and areas where flash or a parting line would be unacceptable. State whether the batch is for internal engineering, customer trials, an exhibition or limited sale. This context allows the provider to plan the master, mould and inspection standard around the actual outcome.
How to evaluate a vacuum casting quotation
Check whether the quotation includes the master, master finishing, silicone moulds, trial pieces, approved parts, colour, post-processing and dimensional inspection. Ask how mould replacement will be handled if the first mould does not support the whole batch. Confirm what constitutes an acceptable part and how rejected pieces affect quantity. A lower price can reflect fewer finishing or inspection steps, so compare scope rather than only totals.
A step-by-step decision framework
- Define the business decision the part must support. Examples include design approval, fitment validation, customer trial, tooling release or a limited pilot batch.
- Identify the technical risks. Mark interfaces, critical dimensions, loads, environmental exposure, visible surfaces and features that may fail during assembly.
- Select the process around those risks. Compare geometry, material behaviour, quantity, finish and design stability rather than choosing only by familiarity or lowest price.
- Agree on acceptance criteria. State what will be measured, assembled, tested or visually approved before the part is accepted.
- Control revisions and approvals. Use a clear file number, record feedback and freeze the approved version before the next manufacturing stage.
Common mistakes to avoid
Blaming every bubble on the vacuum pump.
Casting from a visibly imperfect master.
Using the same gate plan for every geometry.
Ignoring humidity and material storage.
Accepting parts without agreed cosmetic zones.
How Excel Rapidtech can support the project
High-detail masters and visual prototypes may be produced through SLA 3D printing when the geometry and surface requirement are suitable.
Excel Rapidtech can review the CAD model, application, quantity, material expectation, finish and critical dimensions before recommending a suitable route. For this topic, the primary commercial resource is the vacuum casting defects page at https://excelrapidtech.com/services/vacuum-casting/. The company's wider service structure also allows relevant projects to be considered across 3D printing, SLA, SLS, vacuum casting, CNC machining, design support and post-processing rather than being forced into one method.
The recommendation should remain factual and project-specific. Final tolerance, material performance, mould yield, delivery and compliance depend on the approved design, selected material, process plan and documented acceptance criteria. These points should be confirmed during technical review and quotation.
Conclusion
Functional nylon components and complex unsupported shapes may be evaluated through SLS 3D printing for relevant applications.
The right use of vacuum casting defects begins with a clearly defined problem and ends with an evidence-based manufacturing decision. Buyers should connect design maturity, geometry, material behaviour, quantity, finish, inspection and commercial risk instead of selecting a process only by unit price. A detailed brief makes quotations more comparable and helps the manufactured part answer the question it was created to test. Share your CAD file, required quantity, application, critical dimensions and finish expectations with Excel Rapidtech for a technical feasibility review.
Ready to discuss your part?
FAQs
Why do bubbles appear in vacuum-cast parts?
A visible bubble may come from trapped air, poor venting, moisture, incorrect mixing or a geometry that prevents complete filling. Effective troubleshooting follows the complete process rather than blaming a single step.
Can a defect on the master pattern affect every cast part?
Yes. The mould copies the master, so layer marks, scratches, filler lines, dust and uneven paint can be transferred to every cast part. The master should be inspected under suitable light and measured at critical features before the mould is created.
Why do some cavities remain unfilled?
The resin needs a clear path into the cavity and displaced air needs a path out. Poorly placed gates or vents can leave unfilled features, bubbles at high points or flow marks, and complex geometry may require additional planning to ensure complete filling.
What role does moisture play in vacuum casting defects?
Moisture can react with certain resins and create bubbles. Contamination from tools, mould-release products or an improperly prepared mould can also affect the surface and cure, so clean handling is part of quality control.
What should buyers inspect on vacuum-cast parts?
Agree on acceptable cosmetic zones, critical dimensions and the type of defects that will lead to rejection. A hidden internal bubble may be irrelevant for a visual sample but unacceptable for a thin structural area.
Related Reading
- How to Prepare a Master Pattern for Accurate Vacuum-Cast Parts
- How Many Parts Can Be Produced from One Vacuum Casting Silicone Mould?
- Vacuum Casting vs Injection Moulding: Which Process Is Better for Your First 100 Parts?
- Can Vacuum-Cast Parts Be Used for Functional Testing and Customer Trials?
- How to Select the Right Material for Vacuum-Cast Functional Prototypes